Isn't it nice that you don't have to oil your miniSpinner anywhere? Or readjust the drive bands or refinish the wood?
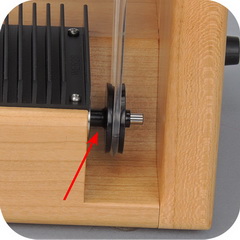
The only maintenance you have to do is keep fiber out of the motor sheave area! Now I know that some of you are saying, "where is the motor sheave?"
Here are pictures showing the Classic and Pro motor sheaves.
|
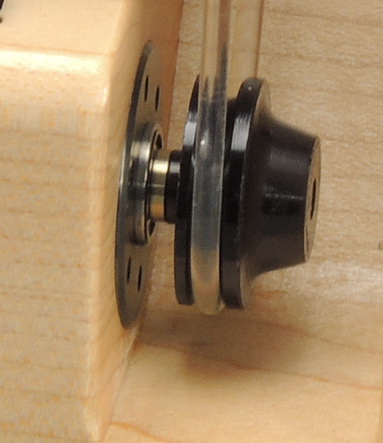
Notice how bright and shiny they are?! Now look at this one. Not shiny...actually fuzzy! Oh no!!
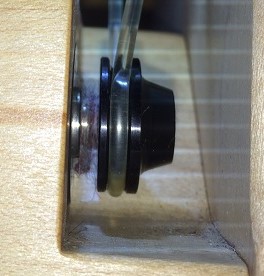
If ignored, ultimately the fiber here builds up and gets forced into the motor. Over time, it could cause a motor failure. So sad...
All you have to do is inspect this area regularly and clear away any little fuzzies that you see. No problem...no sadness!
The fiber gets in there because a bit of it gets airborne as you spin. Think about mohair, alpaca, cotton and angora floating around. You can go for months or even years without any fiber finding its way here, but it is still important to check.
Another factor is if you store your fiber supply to the left side of your spinner, the "wind" created by the flyer going around can pick it up and leave some behind the sheave. Get into the habit of NOT putting your fiber on the left side. Problem solved!
This picture is an extreme example! Fiber was too close to the drive band and got sucked in. The "funny" thing is that this had gone unnoticed for quite a while.
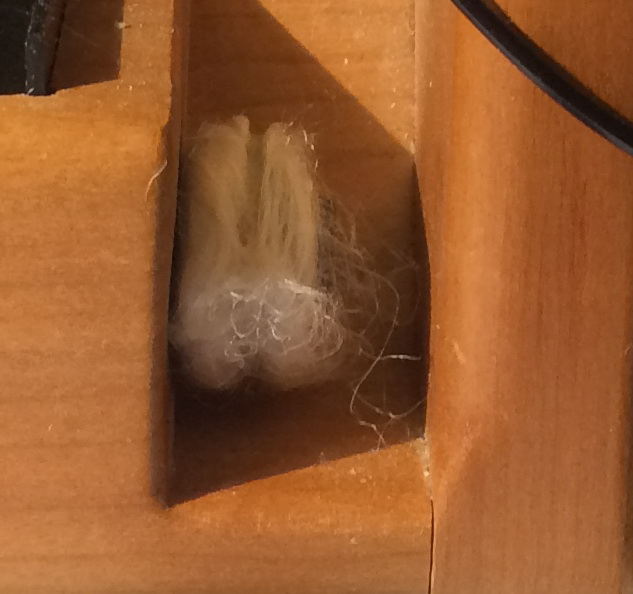
Come on people; work with me here!
When you find fiber here, use a dental pick and tweezers to get it out and keep pulling out fibers until you get them all. Don't stop until the area is all bright and shiny again! Our maintenance kit includes a dental pick for just this reason.
You can review all this in your manual on page 6, or go to this link and check out page 6 online.
Of course, you read the manual when you got your miniSpinner, right? Ahem?! Well, if not, here is your chance to review other things that you might need or want to know.
Other Tips
Brake tension knob
Over time your brake tension knob may become a little stiff to turn or possibly too loose. This can happen because your miniSpinner is made of wood, and wood responds to temperature and humidity. Regardless, it may suit you to adjust the knob so it turns just the way you like.
Instructions on doing this are on page 5 of your manual. Use the Allen wrench that came attached to your miniSpinner manual. It may take a bit of fiddling to get it just right, but you will really appreciate it when you get it perfectly adjusted for you.
Swapping flyers
On page 6, you learn to put a bit of SuperLube grease on the orifice tube before you put in a new flyer. Actually, you should clean old lube off the inside of the miniSpinner orifice while you have the flyer out. Any time you change flyers, clean off the old lube and apply a bit of new.
I have also come to believe that even if you only use one flyer, it is a good idea to remove your flyer and clean out the old and put in new lube every year or so.
Orifice reducers
A reminder; when putting in your orifice reducer, stabilize the flyer crossarm so that when you push, you don't push the entire flyer toward the back of the spinner. And be sure to twist the reducer as you push.

If you have a problem or are not sure that you've done it right (usually
only the first time you do it), remove your flyer, then holding the
crossarms push and twist the orifice reducer into place. You know you
have it right when the red o-ring is fully seated.
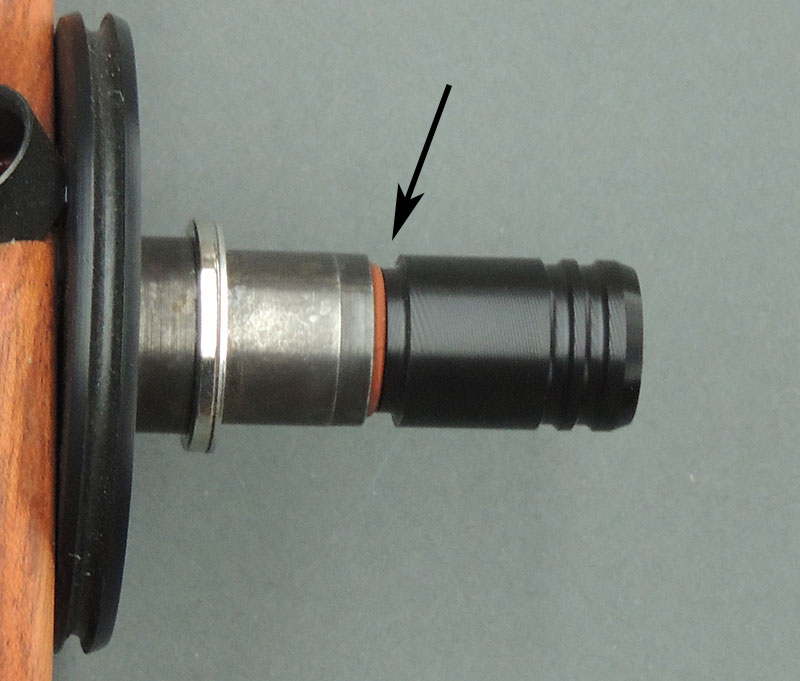
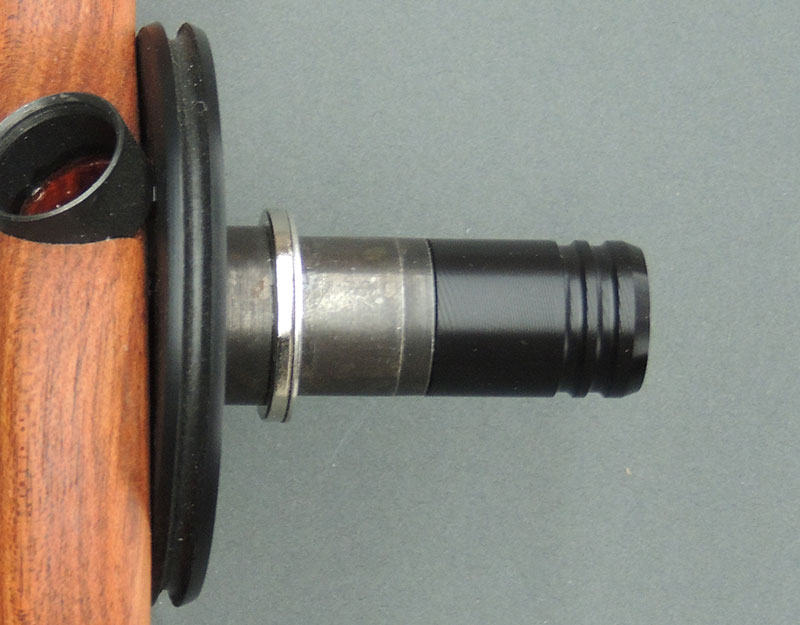
Bad Good
I hope this has been helpful. Let me know if you have any other topics you would like to know more about.
Happy spinning!