Wouldn't it be fun to know what that thingamajig on the whatsit is called when you call us with a question? I'll tell you honestly, it would be MUCH more fun for us.
So, I would like to take a moment and review some important anatomy with you.
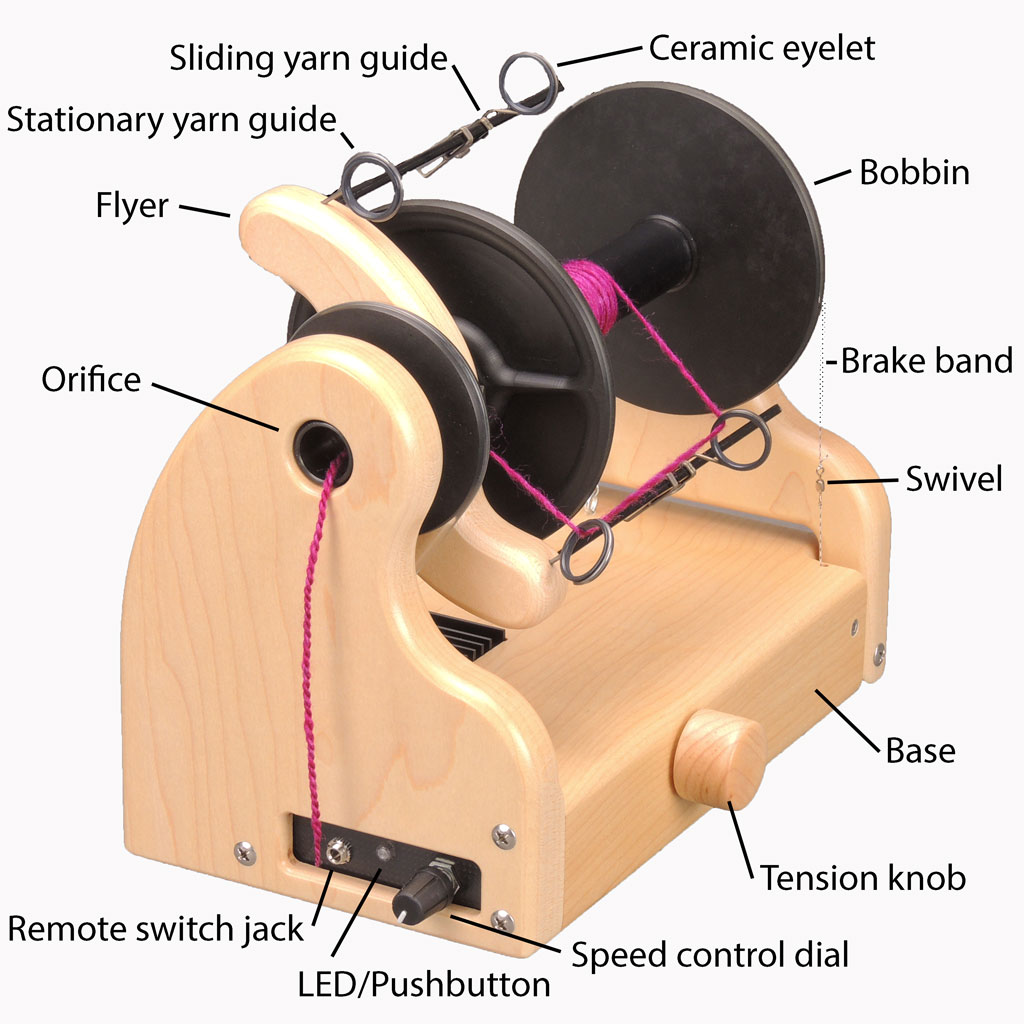
Here is a great side view picture of the Pro. One difference that you can see between the Pro and the Classic is the RPM sensor, which comes standard on the Pro. That is the device that allows you to see RPM readings on the LCD display. You can also add one to your Classic.
The larger motor sheave is also visible in this view of the Pro.

Motor Sheave and Drive Band
Of course, you know all about the motor sheave...since you are checking behind there on a regular basis for fuzz! (see how I find ways to remind you?)
Be sure the drive band is riding in the groove of the sheave. Occasionally, when folks change flyers, the band slips off unnoticed. Then the flyer won't move. uh oh...
Stationary Yarn Guide
Notice the angle of the
stationary yarn guide? It is at a 45° to the flyer arm. By moving your
miniSpinner around, or in and out of bags, the yarn guide can be
knocked loose. If it twists too much, it can bump against your drive
band. You may hear a ticking noise, or things might just not feel right. In that case, twist it back to the angle shown in the top picture.
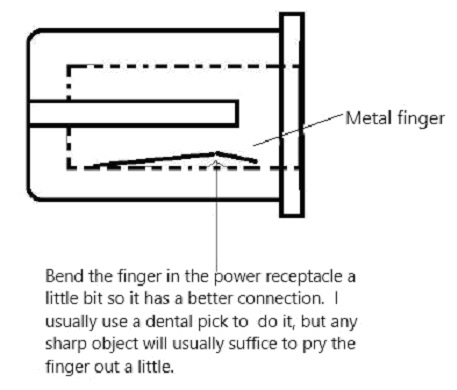
Power Jack
What you might want to know about the power jack is that there is a little tongue inside there that helps make a good connection with your power cord. Inside it looks like this;
Below are the instructions for fixing it if it feels too loose, or you are having connection problems.
Here is a different angle of the miniSpinner
LED/Pushbutton
There's a lot to learn here! That light gives you lots of information. When you power up, if it flashes red, it is telling you that you are in ply (counterclockwise) mode. A green flash indicates, you are in spin (clockwise) mode. Multiple flashes tell you other things. Go to your manual and study up! For the v2 Classic miniSpinner manual click here. For the Pro manual click here.
Ceramic Rings
In the picture above, you see that the yarn guides, both stationary and sliding, have ceramic eyelets. The important thing to know is that ceramic is hard and slippery, but is breakable. So try avoid giving it hard knocks. They are easily replaced and spares are available on our website in the Parts section.
Brake Band and Parts
The swivel on the brake band is one of the most common mystery items (thingies) that we get calls about. Note that swivel is about an inch above the base of the mS. If it is a lot closer to the base than that, it probably means that you are using way too much brake tension. Don't do that!
The characteristics of the brake spring is critical to the proper operation of your miniSpinner. Do not replace the spring with just any spring! You will be disappointed with the resulting brake performance.
Speed Control
If you have the v1 Classic spinner, you don't have an LED/pushbutton. You have a toggle switch. Pushing the toggle to the right sets the flyer in spin mode, and to the left sets the flyer to ply mode. Luckily, not too much goes wrong here, but now you know what to call it!

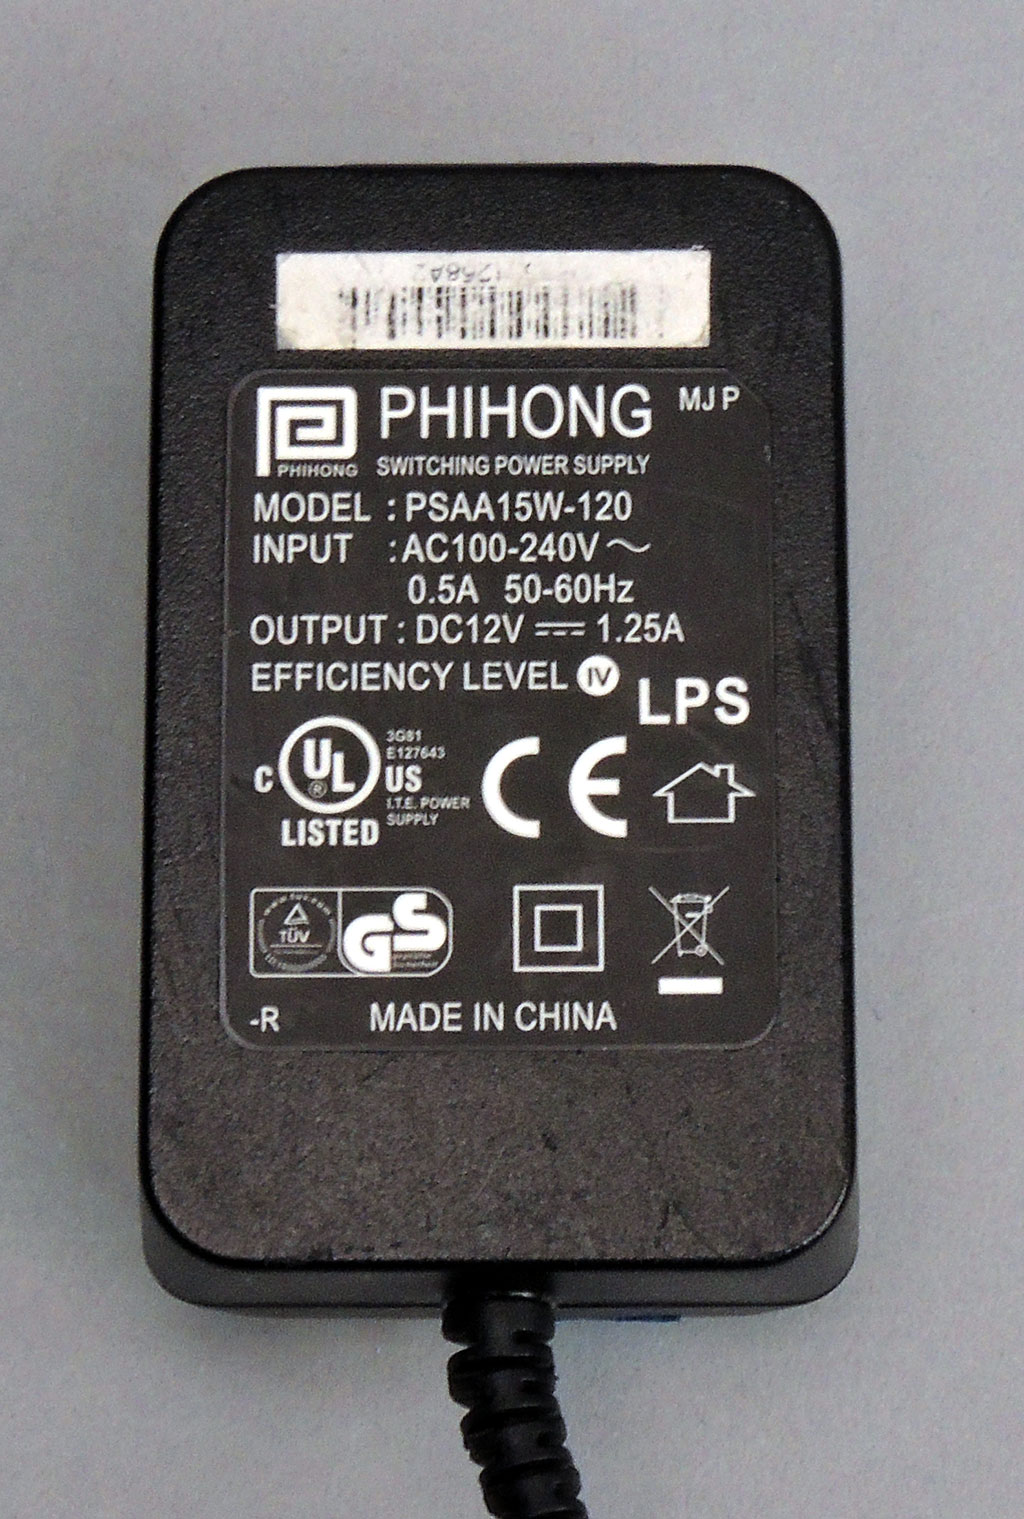
Power Supply
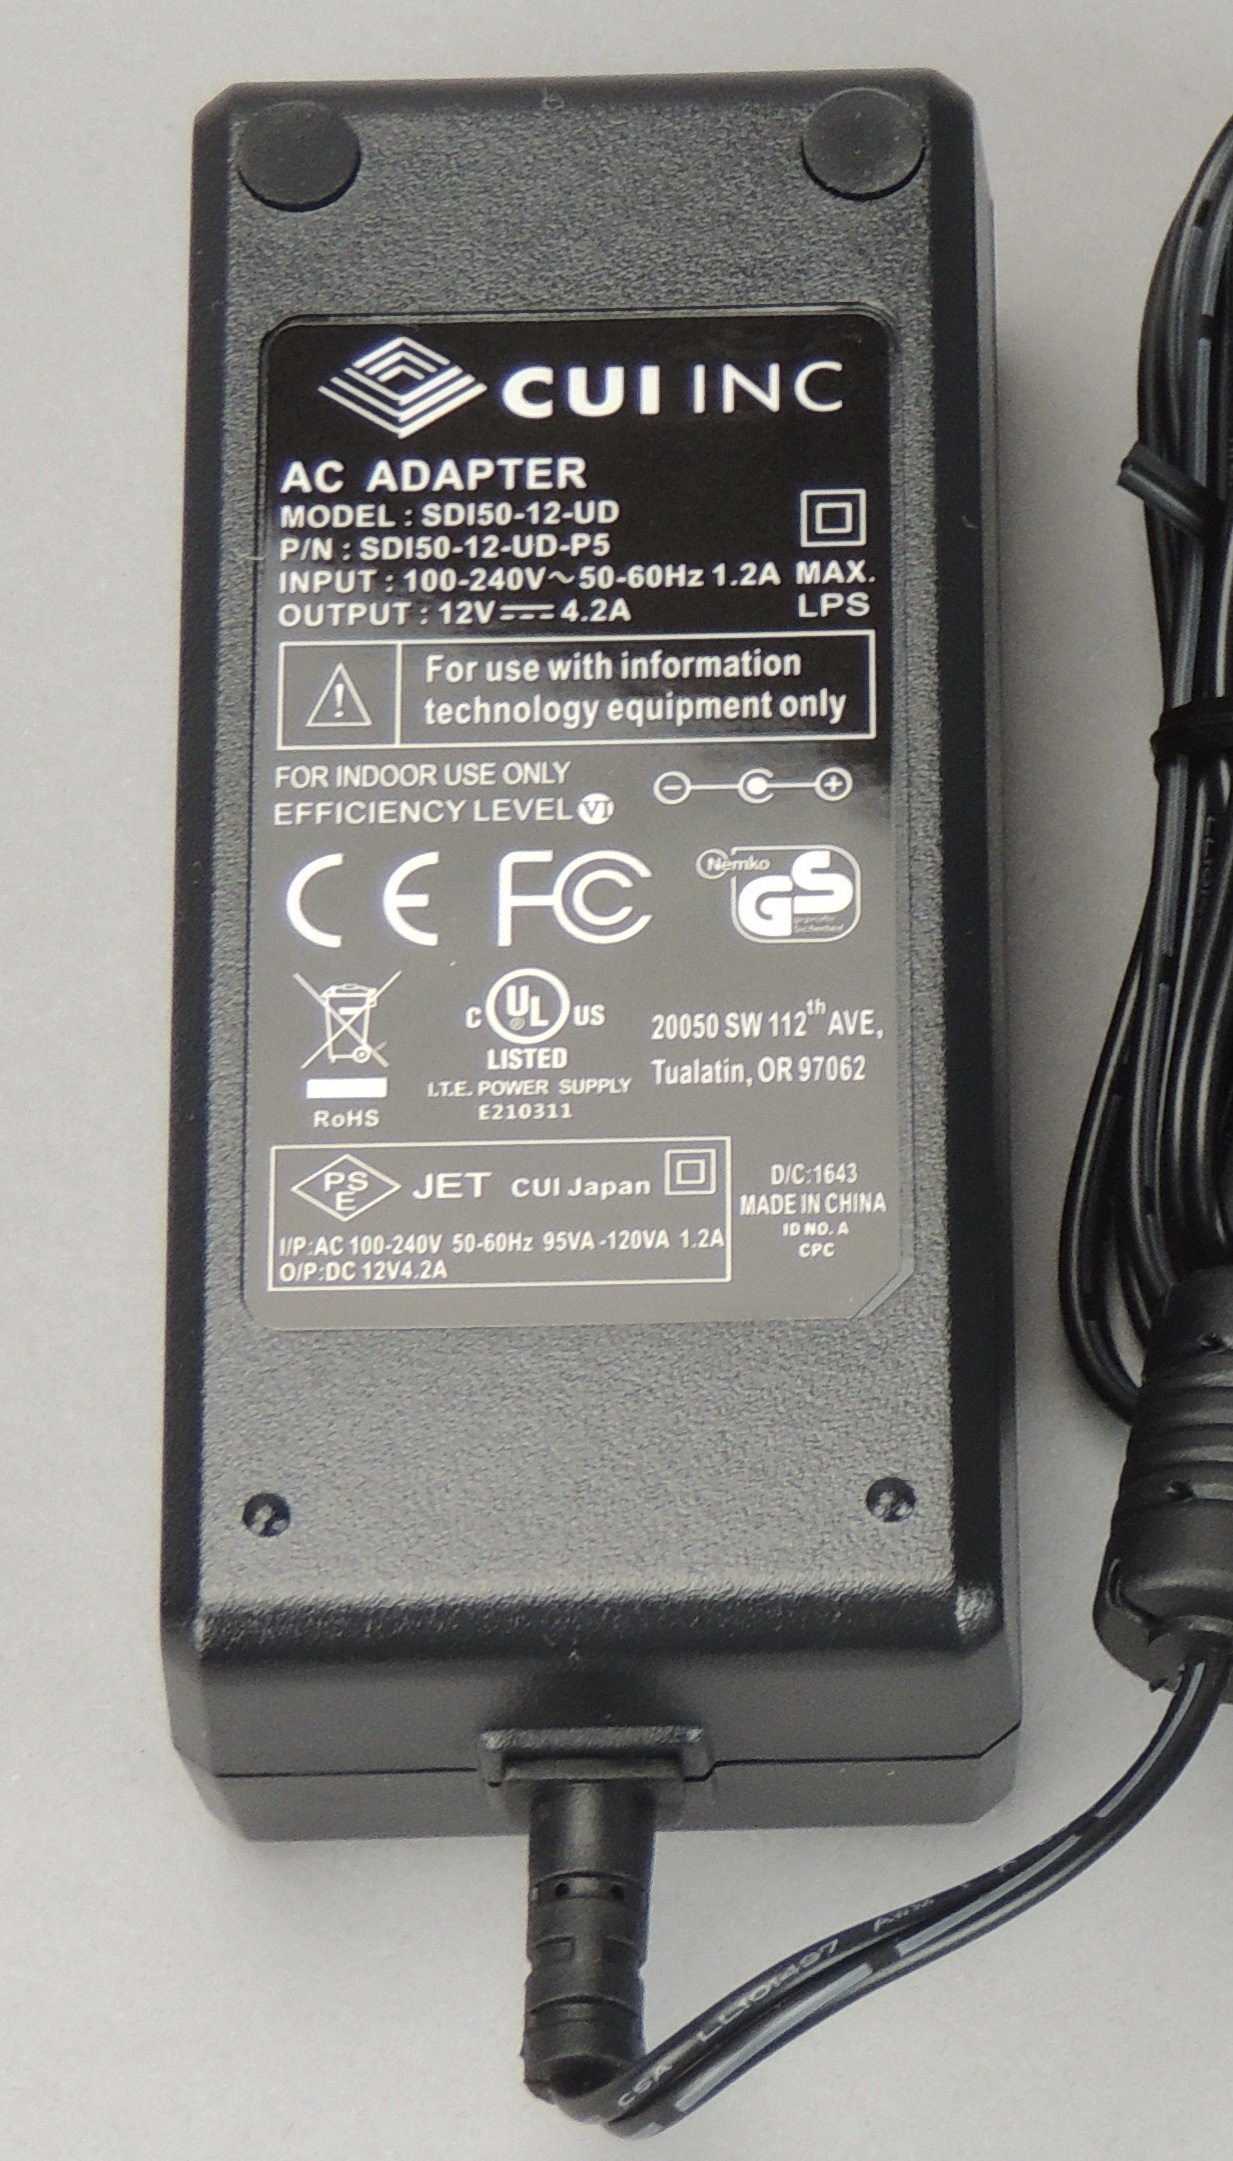
It's important that you use the right power supply with your miniSpinner. The voltage and wattage of the power supply does matter. If you have both a Pro and Classic spinner, I'd suggest that you label your power supplies, so you can't get them mixed up.
It's a good idea to label your power supply regardless. We've had customers who have used a computer cord by mistake. This often doesn't work! The wrong voltage can even damage your mS.
Your Classic power supply should look like this. Take note of the model and output specifications.
This is what your Pro power supply should look like.
Thanks for "listening". Won't it be more fun next time when we talk about your miniSpinner now that you know your ANATOMY!!
Happy Spinning!